Users
Overview of how to manage Users in Typhoon Test Hub.
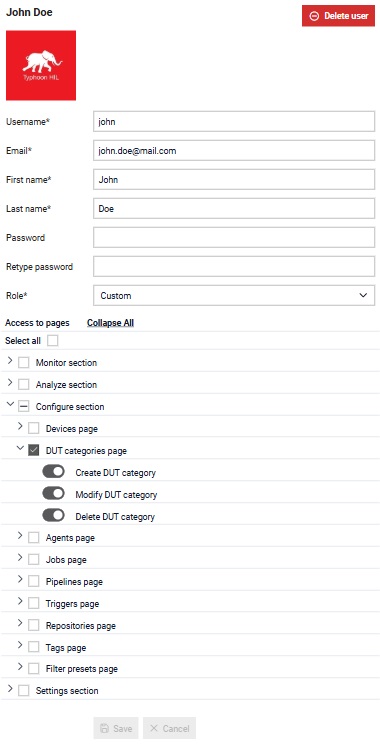
- Admin role - which has full access,
- Developer role - which has access to everything, except the Users page,
- Guest role - which has access only to Overview page and Dashboard screens.
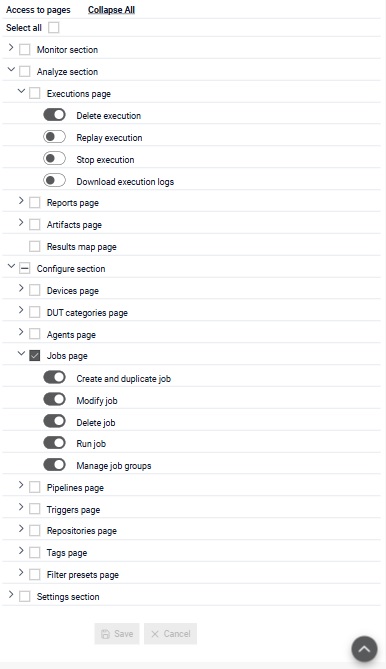
- Custom role - which enables greater flexibility in defining role permissions.

The Users table (Figure 1) shows the following information:
- First name
- Last name
- Username
- Roles
Additionally, specific users can be blocked by clicking on the  button in the table.
Admin users can unblock a user by clicking on the
button in the table.
Admin users can unblock a user by clicking on the  button. Admin users can block users with
developer, guest and custom roles. Currently logged in user can access his
profile page where he can edit his information by clicking on the
button. Admin users can block users with
developer, guest and custom roles. Currently logged in user can access his
profile page where he can edit his information by clicking on the
 button.
 button, columns of the table
can be customized - hidden or shown depending on the preference. Columns of the table
can be reordered by using drag and drop in the table header. When positioning cursor in
between two columns, cursor for column resizing will show and enable change of the
column's width. All changes made to the table will be automatically preserved.
button, columns of the table
can be customized - hidden or shown depending on the preference. Columns of the table
can be reordered by using drag and drop in the table header. When positioning cursor in
between two columns, cursor for column resizing will show and enable change of the
column's width. All changes made to the table will be automatically preserved. User details
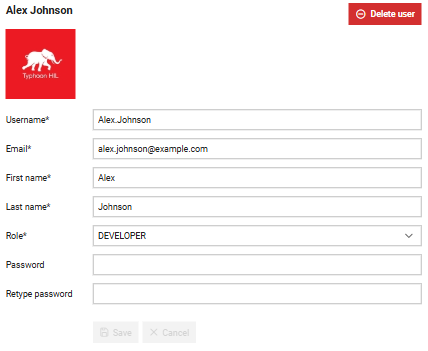
In the Details section, admin users can manage data about a selected user. When a new user is added, the default picture is Typhoon HIL's logo.
Additionally, admins can delete a user by clicking on the  button. All resources
that were reserved by the deleted user will be freed.
button. All resources
that were reserved by the deleted user will be freed.
Custom role definition
Create user
A new user can be added by
clicking on the 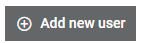 button.
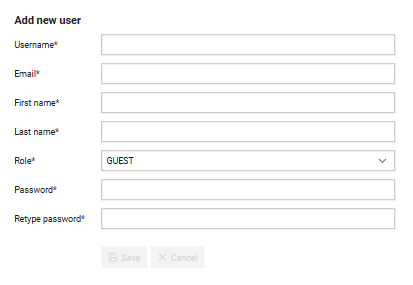
When an admin adds a new user, he needs to fill out the form in Figure 5. This requires the following actions:
- Assign a username which will be used to refer to the user throughout the Typhoon Test Hub. Each username must be unique.
- Enter a email
- First name
- Last name
- Select a role
- Create a password and retype it